Some may have you believe that baking is an arduous, vexatious and even monotonous activity. Balderdash, piffle and poppycock I say, for baking is a wondrous and fantastical diversion from the everyday and the humdrum. You can of course invest time in creating the intricate and the complex and many incredibly talented bakers, patissiers and pastry chefs do just that. But it is important to note that by no means is this an imperative. Take this beautiful, almost exotic cake for instance. With just a modicum of mixing, folding and chopping you can come up with something that is not only entirely delicious, but feels like a proper sophisticated treat, so much so that your lucky guests will presume the process was nothing short of tortuous. Don't tell them otherwise though, we'll keep that our little secret...
Prep time: 25 Mins
Baking time: 40-45 Mins
100g Pistachios
115g Unsalted Butter (Softened)
120g Caster Sugar
2 Large Eggs
1tsp Baking Powder
2tbsp Plain Flour
For the Buttercream
75g Unsalted Butter (Softened)
150g Icing Sugar (Sifted)
0.5-1tsp Rose Water
1-2tsp Cold Water
300g Fresh Strawberries (sliced)
There's no time like the present, so let's get cracking. Preheat the oven to 190C/375F/Gas
5, grease a 20cm square tin and line completely with baking paper. You now need to finely grind the pistachios. I use an electric grinder for this, but you can use a mini chopper if you have one. The trick is to stop just as the nuts start to release their oils and begin to go a little claggy. Once they are ground well, set to one side whilst you prepare the rest of the mixture.
In a large mixing bowl cream together the butter and sugar, then beat in the eggs one at a time. Sift in the baking powder, along with the flour, then add the ground nuts and fold through to an evenly mixed batter. Pour into your prepared tin and bake in the centre of the oven for 40-45 mins, until a metal skewer can be cleanly removed when inserted into the middle of the cake. When you are happy the cake is baked remove from the oven and leave to cool completely in the tin.
When the cake has cooled carefully remove from the tin, peeling off the paper. Now for the buttercream. In a bowl cream together the butter and icing sugar. Do this slowly at first or you will end up dusting your kitchen with icing sugar! Add the rose water and water, then mix until smooth and glossy. You may have noticed that there is a little room for manoeuvre when it comes to the rose water and water. If you prefer just the merest suggestion of floral rose then go for half a teaspoon, but if you want a real heady hit then go all out with a teaspoon. The same sort of thing applies with the cold water. Start with a teaspoon of water, but if you think the buttercream is too thick then go for another. It's completely up to you!
Spread the buttercream relatively thinly over the cooled cake and top with sliced strawberries. If your strawberries are a little under-ripe, or even if you just fancy a change then you can lightly roast the strawberries in the oven, before leaving to cool and topping the cake with them. To do this just chop in half, lay on a tray lined with baking paper, sprinkle with a little caster sugar and roast in the oven, 190C/375F/Gas
5 for about 30 minutes. But I digress, the important thing is the cake in finished. Huzzah!
Tuesday, 30 September 2014
Tuesday, 23 September 2014
Tangerine and Toasted Hazelnut Cake
I find inspiration in the strangest places, be it a sound, a scent or in this case a bloody great orange refrigerator! That may seem rather odd, but when one is as near monomaniacal about baking as I then ideas can be born from almost anywhere.
Once I clapped eyes on the beautiful tangerine beast in question my mind was awash with ideas, from tarty tarts to sugared shortbread. However, marrying the sweet citrus tangerine flavour with toasted hazelnuts proved too tempting a combination to resist and once the thought had entered my mind, I just had to come up with a recipe...
Prep time: 30 Mins
Baking time: 55 Mins
100g Blanched Whole Hazelnuts
200g Unsalted Butter (Softened)
200g Caster Sugar
3 Tangerines
3 Large Eggs
100g Ground Almonds
1tsp Baking Powder
1hpd tbsp Plain Flour
For the white chocolate icing
100g White Chocolate
50g Unsalted Butter (Softened)
100g Icing Sugar
1tsp Orange Blossom Water
Righty ho, let us begin with the hazelnuts. Place the hazelnuts in a dry flat pan over a medium heat and leave to brown, rolling the nuts around every minute or so to prevent them scorching. Once they are nicely coloured, remove from the pan and leave to cool on a plate for about 15 minutes.
Once they have cooled slightly, preheat the oven to 180C/350F/Gas 4, grease a 20cm deep cake tin and line with baking paper. In a large bowl cream together the butter and sugar, then beat in the eggs one at a time. Zest the tangerines (take care with this as the tangerine peel is quite delicate) then add to the mixture, along with the juice from each.
You will now need to grind the hazelnuts, which I do using a mini electric food chopper. The key here is to stop grinding or chopping the nuts as soon as they start to release their oils. You can tell when this is happening as the nuts will start to become a little claggy as they are blitzing. At this stage tip the finely ground hazelnuts into the cake mixture, along with almonds, baking powder and flour then fold through until evenly combined. Even at this stage the cake mixture will have a beautiful, almost intoxicating aroma.
Spoon the mixture into your prepared tin and bake in the centre of the oven for around 55 minutes, until a metal skewer can be cleanly removed when inserted into the middle of the cake. When you are happy the cake is baked remove from the oven and leave to cool completely in the tin, before carefully removing.
This icing is entirely optional, but I think it provides a thoroughly lovely other dimension to an already fantastic cake. To make it melt the white chocolate either over a bain-marie or in the microwave, then set to one side for ten minutes to cool slightly. Cream together the butter and icing sugar, then add the melted chocolate along with the orange blossom water. Spread thinly over the top of the cooled cake and that's it, all done.
Monday, 15 September 2014
Blueberry Bakewell Blondies
Frequent flyers will be more than aware of my love of the traditional bakwell flavour. There's just something about the heady perfume of toasty almonds and sweet jammy fruit that I find so darn irresistible. This time I've bakewelled up some white chocolate blondies, using blueberries and just a dash of vanilla extract to add another aromatic dimension. You can try other fruits if blueberries don't float your boat, such as tart blackberries, the classic cherries or even plums. Just make sure they are nice and ripe.
You may or may not agree, but often recipes with a 'twist' can often seem a rather daunting prospect. I assure you though that this one is so very easy. Aside from melting some white chocolate and butter, the rest is elementary and the spectacular result belies the ease in its preparation. So what are you waiting for?
Prep time: 20 Mins
Baking time: 30-35 Mins
250g White Chocolate (Broken into squares)
150g Unsalted Butter
150g Light Muscovado Sugar
100g Ground Almonds
65g Plain Flour
1/2tsp Vanilla Extract
1tsp Almond Extract
3 Large Eggs (Beaten)
200g Blueberries
A handful of Flaked Almonds
Time to get your bake on. Preheat the oven to 180C/350F/Gas 4 and line a medium, rectangular baking/roasting tin with baking paper. The tin I used was around 28x23cm in size. Melt together 175g of the white chocolate with the butter, either over a bain-marie or in the microwave (if you are confident in your timings), then set to one side to cool slightly. White chocolate does tend to burn quite quickly so I'd certainly advise to keep an eye on it as it is melting.
In a separate bowl rub together the sugar and flour. I rub together as opposed to mix together as I find sometimes brown sugars can be somewhat lumpy, particularly once the air gets to them. Add the melted white chocolate and butter, then mix. Add the extracts and beaten eggs and mix again, this time vigorously until you are left with a smooth, silky batter. There may be a better way to mix these together but this way works for me!
Take about two thirds of the blueberries, toss into the batter and gently fold through. Pour the batter into your prepared tin, scraping any leftover batter from the bowl, then gently even to the edges. Scatter over the rest of the blueberries, followed by the flaked almonds, then bake in the centre of the oven for around 30-35 minutes, until brown on top and a sharp knife or skewer comes out relatively clean, but a little greasy when inserted into the baked blondie batter. If you are happy, remove from the oven and leave to cool in the tin. When the surface of the bake is no more than slightly warm to the touch, melt the rest of the white chocolate (again either over a bain-marie or in the microwave) then drizzle all over the top. Leave to set.
A tip for you now. As the blondies are soft and syrupy in their texture they can prove a challenge when it comes to slicing, so when they are cool I just pop the tin into the fridge for an hour beforehand. This just firms them up slightly and makes slicing them much easier. Speaking of which, remove the giant blondie from the tin, then slice into squares, peeling off any paper as you go. And there you have it, your work is done.
Monday, 8 September 2014
Torta de Limon
Life for all of us can be somewhat demanding, dispiriting even and always so darn complicated that when it comes to baking, I just want things to be simple. Now in the bake off age it may seem rather trite to unburden oneself of needless cakey complications but what can I say, life is too short to fixate on the near infinite intricacies involved in creating a sweet treat. That's not to say there is no room for the sophisticated and the complex in ones baking repertoire, it's just I'd prefer to leave that to those with more patience, more skill and more time than I.
This gluten-free beauty is simply sensational. Quick and easy to prepare, yet pleasingly peregrine in both flavour and texture it will keep your guests guessing, if they are lucky enough to be gifted a slice or two that is. It's the tangy lemon syrup that does it, not only adding a sweet sharpness, but turning the biscuity crumb sticky and chewy. I've made this one with oranges many many times, but for the foreseeable future it's going to be lemons all the way!
Prep time: 20 Mins
Baking time: 45-50 Mins
For the cake
3 Large Eggs (Separated)
200g Caster Sugar
1tsp Almond Extract
1/2tsp Lemon Extract
The zest of 3 Unwaxed Lemons
200g Ground Almonds
For the syrup
100ml Fresh Lemon Juice (About 3 Lemons)
50g Caster Sugar
So if you are ready, then we'll begin. Preheat the oven to 180C/350F/Gas 4, grease a 20cm baking tin and line with baking paper. Add the egg whites to a large, clean mixing bowl and whisk until starting to stiffen. Add some of the sugar, whisk again, then repeat until all the sugar has been used and the mixture has become glossy and stiff.
In a separate bowl mix together the egg yolks, extracts and lemon zest. Add a third of the egg whites, gently fold through then do the same with the ground almonds. Do this again, then once more until evenly combined then pour or spoon into your prepared tin. Bake in the centre of the oven for around 45-50 minutes, until a metal skewer comes out clean when inserted into the middle of the cake. When you are happy the cake is baked remove from the oven, leave in the tin for 10 mins, then VERY carefully turn out onto a wire rack, peeling off the baking paper from the base.
For the syrup, add the juice and sugar to a small saucepan then fire the heat up on high. Leave to bubble away for 5-10 minutes, until just starting to become syrupy, then remove from the heat. Poke the surface of your warm cake with a toothpick then spoon over some of the syrup. You might want to put a plate under your wire rack for this to catch any syrup that runs off. Leave the syrup to soak into the surface then spoon over some more. Keep doing this until the syrup has gone (Mine usually takes about three soaking sessions), then leave to cool completely. Congratulations, you are finished.
Tuesday, 2 September 2014
White Chocolate, Cinnamon and Orange Nobbers
These nobbers are quite the little rascals, soft and chewy with just a hint of biscuity bite. The combination of rich white chocolate, warm spice and the sweet perfume of citrus may seem somewhat of a mixed bag but have faith in your old friend, as I can promise you that they are absolutely fantastic together, curiously complex, yet deeply satisfying, gratifying and dare I say even a little romantic. Yes a nobber can be romantic!
Prep time: 20 Mins
Baking time: 14-15 Mins
120g Unsalted Butter (Softened)
100g Light Muscovado Sugar
80g Caster Sugar
1 Large Egg
The zest of an Orange
1tsp Cinnamon
1/2tsp Baking Powder
140g Plain Flour
100g Jumbo Oats
200g White Chocolate (Chopped)
Hooray, it's time to bake once more! Preheat the oven to 180C/350F/Gas 4 and line two large baking sheets with baking paper. In a large mixing bowl cream together the butter and the sugars, then beat in the large egg. Add the orange zest and cinnamon, then sift in the baking powder with the flour. Give the mixture a quick mix, then toss in the oats, followed by the white chocolate and fold vigorously to a sticky dough. Take little blobs of dough and place on your prepared baking sheets evenly spaced apart, as they will spread during baking.
Bake in the centre of the oven for around 14-15 minutes, until evenly spread, golden brown and just darkening at the edges. When you are happy they are baked remove from the oven, slide the paper carefully onto wire racks, then leave for 20 minutes to cool slightly. When warm peel each nobber from the tray and return to the wire racks to cool completely. That's it, all done. If you only have a single tray (or can only trust one shelf of your oven) you can bake these in batches, or the dough will keep wrapped in the fridge all day if necessary. To be honest though, once your hooter gets a whiff of the near intoxicating aroma coming from the dough you'll be fortunate to resist scoffing the lot before they even make it to the oven!
Tuesday, 26 August 2014
Roasted Plum Muffins
So I shall now attempt the impossible and talk about plums without resorting to puerile innuendo.
Behold my glorious plums!
Ok I couldn't resist some mild cheekiness, but it is somewhat appropriate for these cheeky rascals. Roasting the plums prior to baking not only brings out the beautiful natural sweetness, but turns them lovely and jammy, which works stunningly with the warm and fragrant spicing. I did consider other spicy alternatives, such as cardamom and even star anise, but for now I've stuck with the more traditional cinnamon and just a hint of nutmeg. However if you want to experiment then have at it my fellow baking adventurer, for you are the master of your relative culinary domain!
Prep time: 25 Mins
Baking time: 30 Mins (Plums) 30 Mins (Muffins)
For the plums
6 Large Plums
25g Unsalted Butter (Melted)
35g Caster Sugar
For the muffins
190g Unsalted Butter (Softened)
190g Light Muscovado Sugar
3 Large Eggs
2tsp Cinnamon
1/2tsp Nutmeg
1tsp Vanilla
200g Flour
1 heaped tsp Baking Powder
Begin by preheating the oven to 200C/400F/Gas 6. Slice the plums in half, destone then place flesh side up on a large baking tray. Brush each generously with melted butter, scatter with caster sugar and roast in the centre of the oven for around 30 minutes, until golden and yielding to the touch. Once roasted remove from the oven and set to one side to cool for ten minutes or so. While they are cooling you can turn the oven down to 180C/350F/Gas 4.
Time for the muffins. Cream together the butter and sugar, then beat in the eggs one at a time. Add the spices and vanilla, then sift in the flour along with the baking powder and mix to a smooth batter. Take a 12 cup muffin tray, line with muffin cases then evenly dollop the batter into each. Gently lift your plums (must... resist... innuendo...) from the tray and place one on top of each nearly filled muffin case. Bake in the centre of the oven for around 30 minutes, until slightly risen with the plums just starting to catch, then remove. If you want to be sure the muffins are baked you can insert a metal skewer into one, as it should come out cleanly, but I personally like to avoid piercing my plums (must... resist...). Leave in the tray for ten minutes, before carefully removing and leaving each muffin to cool completely on a wire rack. Finished!
Wednesday, 20 August 2014
Oatmeal and Raisin Cookie Cake
cookieCOOKIEcookieCOOKIEcookieCOOKIEcookieCOOKIEcookieCOOKIEcookie
CAKEcakeCAKEcakeCAKEcakeCAKEcakeCAKEcakeCAKEcakeCAKEcakeCAKE
cookieCOOKIEcookieCOOKIEcookieCOOKIEcookieCOOKIEcookieCOOKIEcookie
CAKEcakeCAKEcakeCAKEcakeCAKEcakeCAKEcakeCAKEcakeCAKEcakeCAKE
cookieCOOKIEcookieCOOKIEcookieCOOKIEcookieCOOKIEcookieCOOKIEcookie
CAKEcakeCAKEcakeCAKEcakeCAKEcakeCAKEcakeCAKEcakeCAKEcakeCAKE
Prep time: 15 Mins
Baking time: 40-45 Mins
175g Unsalted Butter (Softened)
165g Light Muscovado Sugar
50g Caster Sugar
1 Large Egg
2tsp Vanilla Extract
2tsp Cinnamon
225g Plain Flour
1.5tsp Baking Powder
135g Jumbo Oats
200g Fat Plump Raisins
To the kitchen! Preheat the oven to 180C/350F/Gas 4, grease a 20cm springform baking tin and line the base with baking paper. In a large bowl cream together the butter and the sugars, then beat in the egg along with the vanilla extract. Add the cinnamon, then sift in the plain flour and baking powder. Finally scatter in the oats, followed by the raisins and mix to a sticky dough. You can toil with a wooden spoon if you prefer, but I find by far the best way to mix the dough is to get your hand in there. Evenly press the dough into your prepared tin (again your hand is the optimal tool for this task), then bake in the centre of the oven for 40-45 minutes, until golden brown on top and just firm to the touch. When you are happy the cookie cake is baked remove from the oven, leave in the tin for 30 minutes, then carefully remove and leave to cool completely on a wire rack. And there you are, you are all done. Now how easy was that?
CAKEcakeCAKEcakeCAKEcakeCAKEcakeCAKEcakeCAKEcakeCAKEcakeCAKE
cookieCOOKIEcookieCOOKIEcookieCOOKIEcookieCOOKIEcookieCOOKIEcookie
CAKEcakeCAKEcakeCAKEcakeCAKEcakeCAKEcakeCAKEcakeCAKEcakeCAKE
cookieCOOKIEcookieCOOKIEcookieCOOKIEcookieCOOKIEcookieCOOKIEcookie
CAKEcakeCAKEcakeCAKEcakeCAKEcakeCAKEcakeCAKEcakeCAKEcakeCAKE
Prep time: 15 Mins
Baking time: 40-45 Mins
175g Unsalted Butter (Softened)
165g Light Muscovado Sugar
50g Caster Sugar
1 Large Egg
2tsp Vanilla Extract
2tsp Cinnamon
225g Plain Flour
1.5tsp Baking Powder
135g Jumbo Oats
200g Fat Plump Raisins
To the kitchen! Preheat the oven to 180C/350F/Gas 4, grease a 20cm springform baking tin and line the base with baking paper. In a large bowl cream together the butter and the sugars, then beat in the egg along with the vanilla extract. Add the cinnamon, then sift in the plain flour and baking powder. Finally scatter in the oats, followed by the raisins and mix to a sticky dough. You can toil with a wooden spoon if you prefer, but I find by far the best way to mix the dough is to get your hand in there. Evenly press the dough into your prepared tin (again your hand is the optimal tool for this task), then bake in the centre of the oven for 40-45 minutes, until golden brown on top and just firm to the touch. When you are happy the cookie cake is baked remove from the oven, leave in the tin for 30 minutes, then carefully remove and leave to cool completely on a wire rack. And there you are, you are all done. Now how easy was that?
Monday, 18 August 2014
My Baking Adventures - July/August 2014

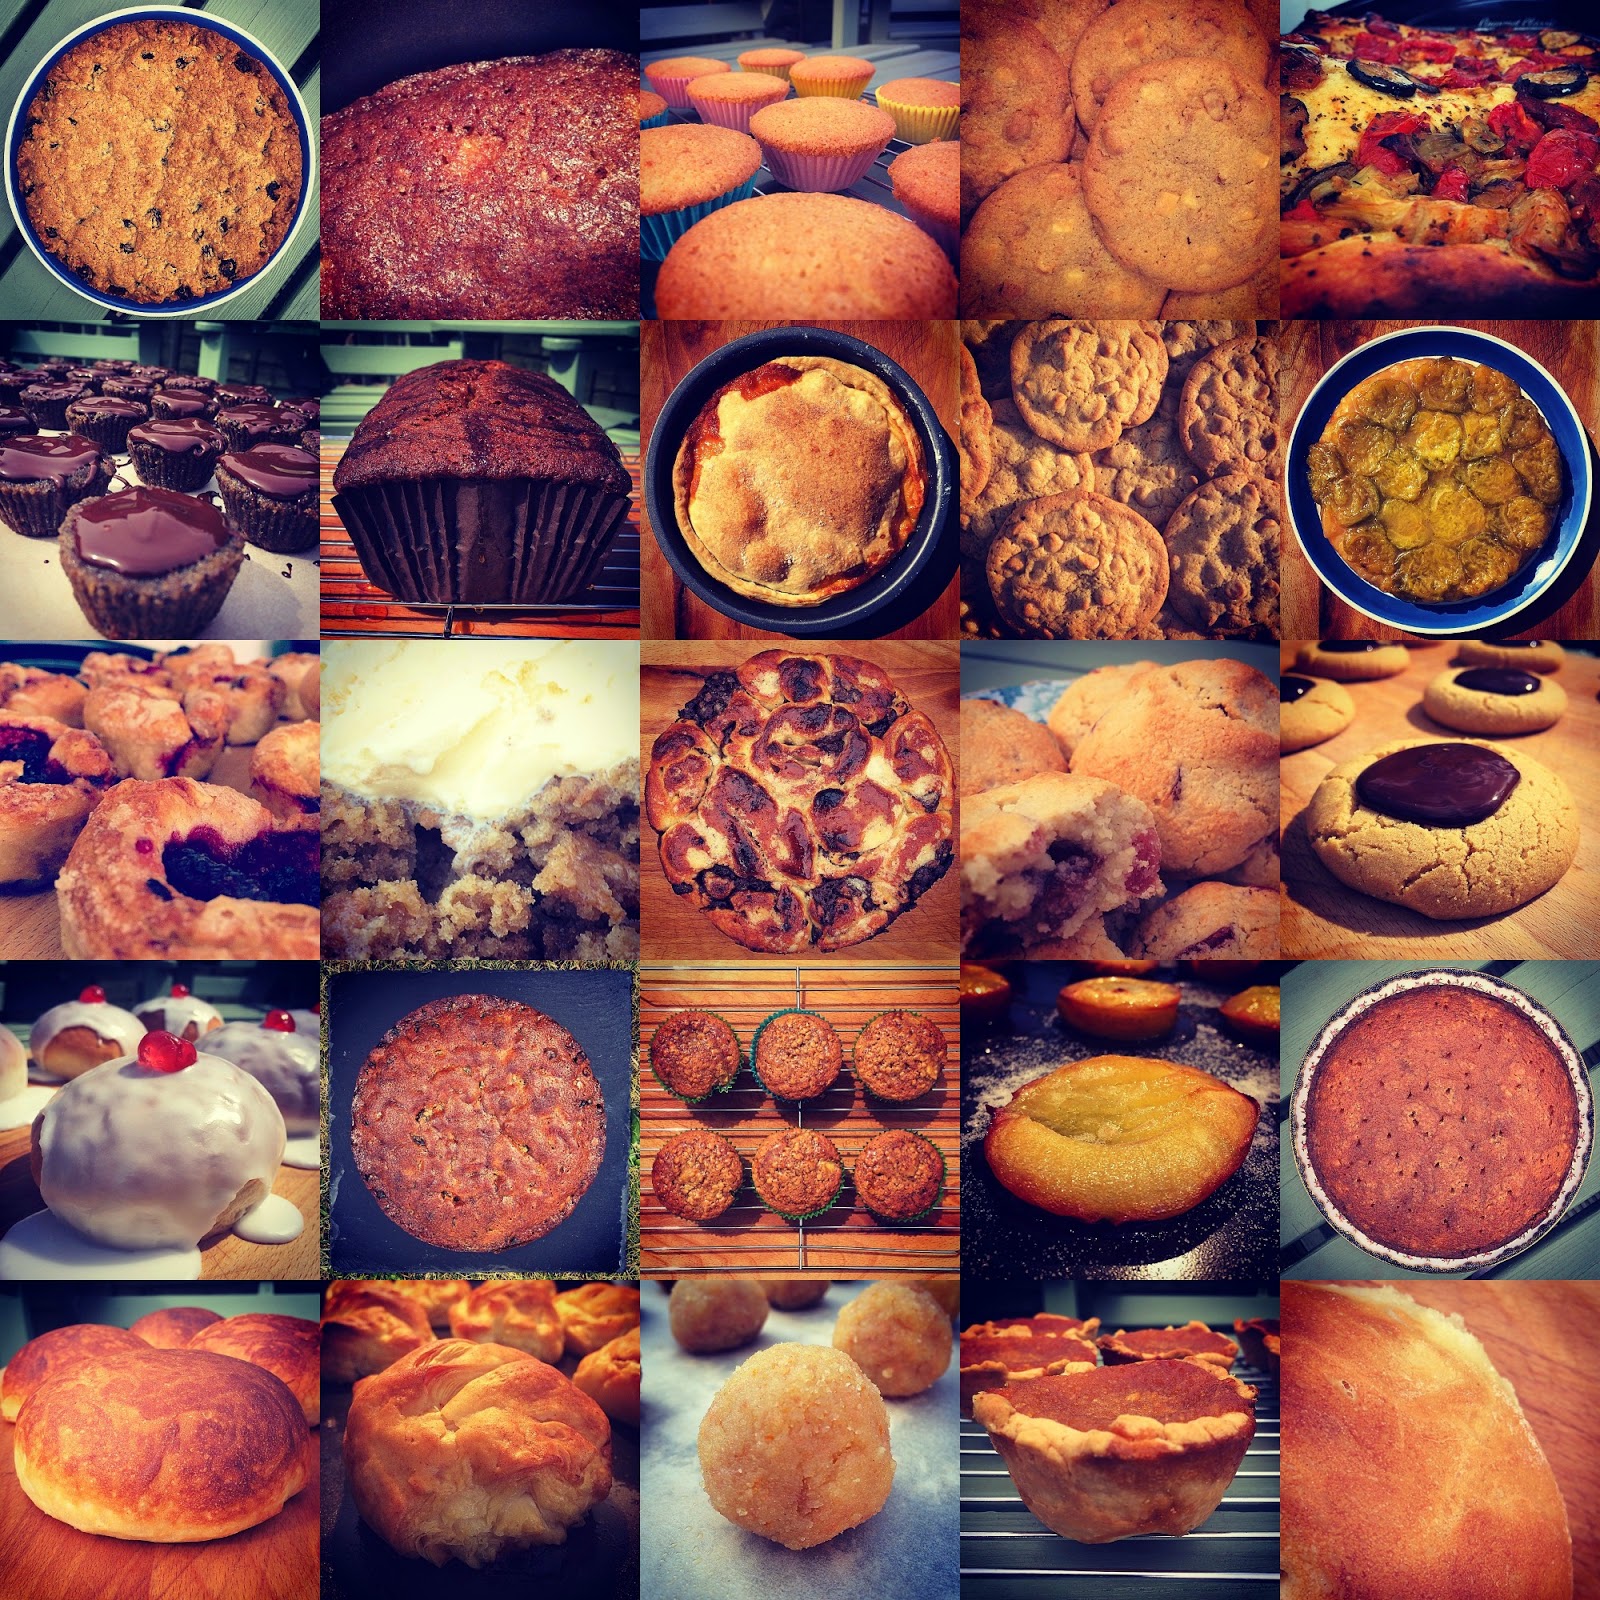
Here's a peek at some of what I've been making and baking over the last month. I love to hear all of your comments and questions, so if you have any then don't hesitate to get in touch!
Tuesday, 12 August 2014
Peanut Butter and Chocolate Dimples
Some may say that I am addicted to cake. To that I answer nay, for although I freely admit that I am a caking fanatic eating the results is merely an occasional indulgence. Biscuits and cookies on the other hand? Well those are another story entirely. Be it a beautifully biscuity biscuit, or a cheekily chewy cookie when it comes to afternoon tea time, I am powerless to resist their charms. There's just something so perfect about a piping hot cup of rich, black, leaf tea and a sweet, satisfying biscuit or cookie on the side and I don't think one could ever tire of such a paradisical pairing. The only question is, to dunk or not to dunk?
Prep time: 15 Mins
Baking time: 14 Mins
120g Unsalted Butter (Softened)
120g Light Muscovado Sugar
65g Caster Sugar
3tbsp Smooth Peanut Butter (I use a cheap brand for this, the one beginning with S)
1tsp Vanilla Extract
150g Plain Flour
1/2tsp Baking Powder
100g Dark Chocolate
Begin by preheating the oven to 180C/350F/Gas 4 and lining 2 large flat baking sheets with baking paper. In a large bowl cream together the butter and sugars, then mix in the peanut butter and vanilla extract. Sift in the flour and baking powder then mix to a soft biscuit dough. Take a small handful of dough, roll into a ball, slightly smaller than a golf ball, then press to a fat round. Repeat for the rest of the dough and place each on your baking sheets, evenly spaced apart. You should easily get at least a bakers dozen out of that quantity of mixture. Bake in the centre of the oven for around 14 minutes, until slight spread and a light golden brown. They will also have risen slightly in the centre. When you are happy the biscuits are baked remove from the oven then carefully slide the baking paper from the trays onto wire racks. Leave for half an hour, then peel each biscuit from the paper and return to the wire racks until completely cool. You'll find as they cool the centre of each biscuit sinks slightly into a dimple, which we shall now fill with chocolate.
Melt the chocolate either over a bain-marie or in the microwave (if you are confident in your timings). Take a teaspoonful of the melted chocolate and gently blob into each dimple. Leave to set and your work is complete. Well done!
Monday, 4 August 2014
Blackberry Buns 'O' Fun
Baking can be refined, baking can be sophisticated and baking can be complex. But for me baking is at its best when it is frivolous, fanciful and downright fun. To bake is to leave your serious side at the door, to embrace your inner rascal and the to let your mischievous side run riot. These buns 'o' fun are so brazenly naughty that they border on the farcical and are actually somewhat of a challenge to describe. Sitting somewhere between a doughnut and a sweet bread, but with a few tart blackberries and white chocolate thrown in (just because), they may not be particularly wholesome, but they are downright delicious. More importantly though they are such fun to make and always raise a smile when served, well if you can bring yourself to share that is!
Prep time: 30 Mins (Plus some proving time)
Baking time: 20-25 Mins
7g Sachet of Fast Action Yeast
1/2tsp Caster Sugar
170ml Tepid Water
250g Strong White Bread Flour
1/2tsp Salt
25g Unsalted Butter
50g Lard (At room temperature)
50g Caster Sugar
100g White Chocolate (Finely Chopped)
150g Fresh Blackberries
Off we go! In a large bowl add the yeast, 1/2tsp of caster sugar and water. Mix until the yeast starts to dissolve, then add the flour and salt. Bring together to a loose dough then tip out onto a lightly floured surface and knead, stretching the dough, folding it back on itself and repeating. You can re-dust your surface if the dough is too sticky, but try to avoid adding too much if you can. When the dough is smooth and elastic place into a clean bowl lightly dusted with flour, cover with a damp tea towel and leave in a warm place for around 75 minutes, until doubled in sized.
Time for some greasing. Grease a flat, dry surface, lightly grease a rolling pin and (you've guessed it) grease a 12 cup muffin tray. Tip the risen dough out onto your greased surface and roll to a large, flat rectangle. Take the 25g of unsalted butter, add 15g of the lard and melt (I do this in the microwave). Brush the melted butter/lard over the rolled dough, then scatter over the white chocolate. Roll up into a big sausage, then slice into twelve rounds and place into your muffin tray. Press a few blackberries into the middle of each round, then loosely re-cover with your tea towel and leave in the kitchen for a further 15 minutes. At the same time preheat the oven to 200C/400F/Gas 6.
Carefully remove the damp tea towel. Dot a few little blobs of the leftover lard onto the top of each risen bun, sprinkle generously with sugar then bake in the centre of the oven for around 20-25 minutes, until golden brown. When you are happy they are baked remove from the oven and carefully coax each bun from its cup. Now you can serve these cold (they even keep well overnight) but I find them near irresistible straight from the oven. Over to you!
Subscribe to:
Comments (Atom)