So I shall now attempt the impossible and talk about plums without resorting to puerile innuendo.
Behold my glorious plums!
Ok I couldn't resist some mild cheekiness, but it is somewhat appropriate for these cheeky rascals. Roasting the plums prior to baking not only brings out the beautiful natural sweetness, but turns them lovely and jammy, which works stunningly with the warm and fragrant spicing. I did consider other spicy alternatives, such as cardamom and even star anise, but for now I've stuck with the more traditional cinnamon and just a hint of nutmeg. However if you want to experiment then have at it my fellow baking adventurer, for you are the master of your relative culinary domain!
Prep time: 25 Mins
Baking time: 30 Mins (Plums) 30 Mins (Muffins)
For the plums
6 Large Plums
25g Unsalted Butter (Melted)
35g Caster Sugar
For the muffins
190g Unsalted Butter (Softened)
190g Light Muscovado Sugar
3 Large Eggs
2tsp Cinnamon
1/2tsp Nutmeg
1tsp Vanilla
200g Flour
1 heaped tsp Baking Powder
Begin by preheating the oven to 200C/400F/Gas 6. Slice the plums in half, destone then place flesh side up on a large baking tray. Brush each generously with melted butter, scatter with caster sugar and roast in the centre of the oven for around 30 minutes, until golden and yielding to the touch. Once roasted remove from the oven and set to one side to cool for ten minutes or so. While they are cooling you can turn the oven down to 180C/350F/Gas 4.
Time for the muffins. Cream together the butter and sugar, then beat in the eggs one at a time. Add the spices and vanilla, then sift in the flour along with the baking powder and mix to a smooth batter. Take a 12 cup muffin tray, line with muffin cases then evenly dollop the batter into each. Gently lift your plums (must... resist... innuendo...) from the tray and place one on top of each nearly filled muffin case. Bake in the centre of the oven for around 30 minutes, until slightly risen with the plums just starting to catch, then remove. If you want to be sure the muffins are baked you can insert a metal skewer into one, as it should come out cleanly, but I personally like to avoid piercing my plums (must... resist...). Leave in the tray for ten minutes, before carefully removing and leaving each muffin to cool completely on a wire rack. Finished!
Tuesday, 26 August 2014
Wednesday, 20 August 2014
Oatmeal and Raisin Cookie Cake
cookieCOOKIEcookieCOOKIEcookieCOOKIEcookieCOOKIEcookieCOOKIEcookie
CAKEcakeCAKEcakeCAKEcakeCAKEcakeCAKEcakeCAKEcakeCAKEcakeCAKE
cookieCOOKIEcookieCOOKIEcookieCOOKIEcookieCOOKIEcookieCOOKIEcookie
CAKEcakeCAKEcakeCAKEcakeCAKEcakeCAKEcakeCAKEcakeCAKEcakeCAKE
cookieCOOKIEcookieCOOKIEcookieCOOKIEcookieCOOKIEcookieCOOKIEcookie
CAKEcakeCAKEcakeCAKEcakeCAKEcakeCAKEcakeCAKEcakeCAKEcakeCAKE
Prep time: 15 Mins
Baking time: 40-45 Mins
175g Unsalted Butter (Softened)
165g Light Muscovado Sugar
50g Caster Sugar
1 Large Egg
2tsp Vanilla Extract
2tsp Cinnamon
225g Plain Flour
1.5tsp Baking Powder
135g Jumbo Oats
200g Fat Plump Raisins
To the kitchen! Preheat the oven to 180C/350F/Gas 4, grease a 20cm springform baking tin and line the base with baking paper. In a large bowl cream together the butter and the sugars, then beat in the egg along with the vanilla extract. Add the cinnamon, then sift in the plain flour and baking powder. Finally scatter in the oats, followed by the raisins and mix to a sticky dough. You can toil with a wooden spoon if you prefer, but I find by far the best way to mix the dough is to get your hand in there. Evenly press the dough into your prepared tin (again your hand is the optimal tool for this task), then bake in the centre of the oven for 40-45 minutes, until golden brown on top and just firm to the touch. When you are happy the cookie cake is baked remove from the oven, leave in the tin for 30 minutes, then carefully remove and leave to cool completely on a wire rack. And there you are, you are all done. Now how easy was that?
CAKEcakeCAKEcakeCAKEcakeCAKEcakeCAKEcakeCAKEcakeCAKEcakeCAKE
cookieCOOKIEcookieCOOKIEcookieCOOKIEcookieCOOKIEcookieCOOKIEcookie
CAKEcakeCAKEcakeCAKEcakeCAKEcakeCAKEcakeCAKEcakeCAKEcakeCAKE
cookieCOOKIEcookieCOOKIEcookieCOOKIEcookieCOOKIEcookieCOOKIEcookie
CAKEcakeCAKEcakeCAKEcakeCAKEcakeCAKEcakeCAKEcakeCAKEcakeCAKE
Prep time: 15 Mins
Baking time: 40-45 Mins
175g Unsalted Butter (Softened)
165g Light Muscovado Sugar
50g Caster Sugar
1 Large Egg
2tsp Vanilla Extract
2tsp Cinnamon
225g Plain Flour
1.5tsp Baking Powder
135g Jumbo Oats
200g Fat Plump Raisins
To the kitchen! Preheat the oven to 180C/350F/Gas 4, grease a 20cm springform baking tin and line the base with baking paper. In a large bowl cream together the butter and the sugars, then beat in the egg along with the vanilla extract. Add the cinnamon, then sift in the plain flour and baking powder. Finally scatter in the oats, followed by the raisins and mix to a sticky dough. You can toil with a wooden spoon if you prefer, but I find by far the best way to mix the dough is to get your hand in there. Evenly press the dough into your prepared tin (again your hand is the optimal tool for this task), then bake in the centre of the oven for 40-45 minutes, until golden brown on top and just firm to the touch. When you are happy the cookie cake is baked remove from the oven, leave in the tin for 30 minutes, then carefully remove and leave to cool completely on a wire rack. And there you are, you are all done. Now how easy was that?
Monday, 18 August 2014
My Baking Adventures - July/August 2014

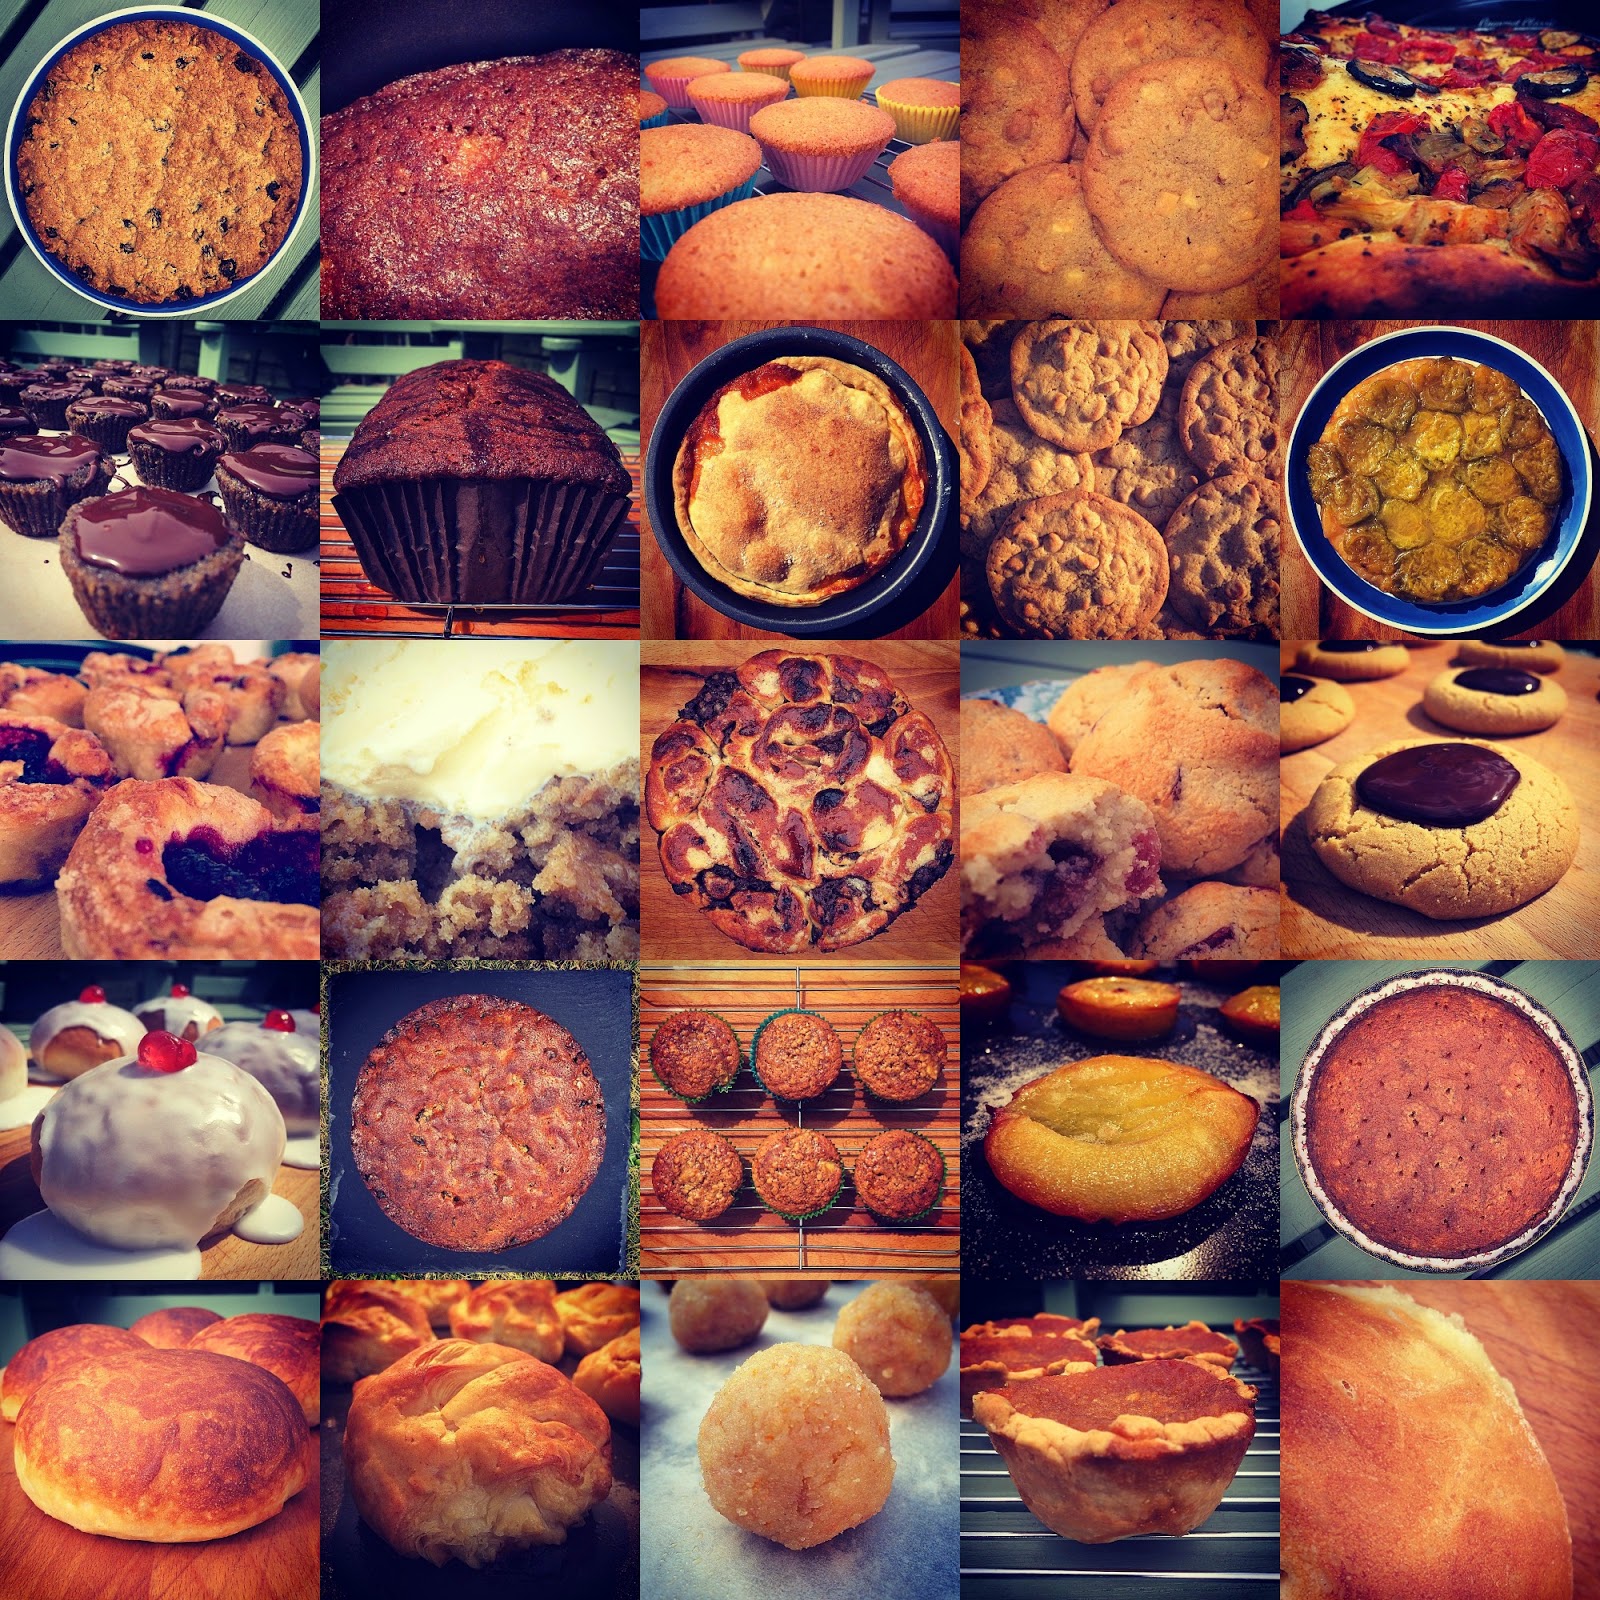
Here's a peek at some of what I've been making and baking over the last month. I love to hear all of your comments and questions, so if you have any then don't hesitate to get in touch!
Tuesday, 12 August 2014
Peanut Butter and Chocolate Dimples
Some may say that I am addicted to cake. To that I answer nay, for although I freely admit that I am a caking fanatic eating the results is merely an occasional indulgence. Biscuits and cookies on the other hand? Well those are another story entirely. Be it a beautifully biscuity biscuit, or a cheekily chewy cookie when it comes to afternoon tea time, I am powerless to resist their charms. There's just something so perfect about a piping hot cup of rich, black, leaf tea and a sweet, satisfying biscuit or cookie on the side and I don't think one could ever tire of such a paradisical pairing. The only question is, to dunk or not to dunk?
Prep time: 15 Mins
Baking time: 14 Mins
120g Unsalted Butter (Softened)
120g Light Muscovado Sugar
65g Caster Sugar
3tbsp Smooth Peanut Butter (I use a cheap brand for this, the one beginning with S)
1tsp Vanilla Extract
150g Plain Flour
1/2tsp Baking Powder
100g Dark Chocolate
Begin by preheating the oven to 180C/350F/Gas 4 and lining 2 large flat baking sheets with baking paper. In a large bowl cream together the butter and sugars, then mix in the peanut butter and vanilla extract. Sift in the flour and baking powder then mix to a soft biscuit dough. Take a small handful of dough, roll into a ball, slightly smaller than a golf ball, then press to a fat round. Repeat for the rest of the dough and place each on your baking sheets, evenly spaced apart. You should easily get at least a bakers dozen out of that quantity of mixture. Bake in the centre of the oven for around 14 minutes, until slight spread and a light golden brown. They will also have risen slightly in the centre. When you are happy the biscuits are baked remove from the oven then carefully slide the baking paper from the trays onto wire racks. Leave for half an hour, then peel each biscuit from the paper and return to the wire racks until completely cool. You'll find as they cool the centre of each biscuit sinks slightly into a dimple, which we shall now fill with chocolate.
Melt the chocolate either over a bain-marie or in the microwave (if you are confident in your timings). Take a teaspoonful of the melted chocolate and gently blob into each dimple. Leave to set and your work is complete. Well done!
Monday, 4 August 2014
Blackberry Buns 'O' Fun
Baking can be refined, baking can be sophisticated and baking can be complex. But for me baking is at its best when it is frivolous, fanciful and downright fun. To bake is to leave your serious side at the door, to embrace your inner rascal and the to let your mischievous side run riot. These buns 'o' fun are so brazenly naughty that they border on the farcical and are actually somewhat of a challenge to describe. Sitting somewhere between a doughnut and a sweet bread, but with a few tart blackberries and white chocolate thrown in (just because), they may not be particularly wholesome, but they are downright delicious. More importantly though they are such fun to make and always raise a smile when served, well if you can bring yourself to share that is!
Prep time: 30 Mins (Plus some proving time)
Baking time: 20-25 Mins
7g Sachet of Fast Action Yeast
1/2tsp Caster Sugar
170ml Tepid Water
250g Strong White Bread Flour
1/2tsp Salt
25g Unsalted Butter
50g Lard (At room temperature)
50g Caster Sugar
100g White Chocolate (Finely Chopped)
150g Fresh Blackberries
Off we go! In a large bowl add the yeast, 1/2tsp of caster sugar and water. Mix until the yeast starts to dissolve, then add the flour and salt. Bring together to a loose dough then tip out onto a lightly floured surface and knead, stretching the dough, folding it back on itself and repeating. You can re-dust your surface if the dough is too sticky, but try to avoid adding too much if you can. When the dough is smooth and elastic place into a clean bowl lightly dusted with flour, cover with a damp tea towel and leave in a warm place for around 75 minutes, until doubled in sized.
Time for some greasing. Grease a flat, dry surface, lightly grease a rolling pin and (you've guessed it) grease a 12 cup muffin tray. Tip the risen dough out onto your greased surface and roll to a large, flat rectangle. Take the 25g of unsalted butter, add 15g of the lard and melt (I do this in the microwave). Brush the melted butter/lard over the rolled dough, then scatter over the white chocolate. Roll up into a big sausage, then slice into twelve rounds and place into your muffin tray. Press a few blackberries into the middle of each round, then loosely re-cover with your tea towel and leave in the kitchen for a further 15 minutes. At the same time preheat the oven to 200C/400F/Gas 6.
Carefully remove the damp tea towel. Dot a few little blobs of the leftover lard onto the top of each risen bun, sprinkle generously with sugar then bake in the centre of the oven for around 20-25 minutes, until golden brown. When you are happy they are baked remove from the oven and carefully coax each bun from its cup. Now you can serve these cold (they even keep well overnight) but I find them near irresistible straight from the oven. Over to you!
Subscribe to:
Comments (Atom)